Guides8 min readFloorGen team
How to Measure a Room for a Floor Plan (Step by Step)
How to measure a room for a floor plan: running vs split measurements, wall thickness, doors and windows, diagonals and ceiling height, with a worked example.
To measure a room for a floor plan, sketch the room first, then measure each wall at about waist height from corner to corner, taking running measurements to every door and window edge from the same starting corner. Add the wall thickness at a doorway, both diagonals to check the room is square, and the ceiling height. With those five sets of numbers you can draw a room that matches the real one to within an inch or so.
This guide walks through each step on a typical 12 × 12 ft bedroom, explains why running measurements beat measuring each piece separately, and shows what to do when the corners are not square.
What you need to measure a room for a floor plan
- A 25 ft tape measure with a stiff blade, and ideally a laser distance measurer. A laser is faster for long walls and ceilings; a tape is better for short pieces like window trim and wall thickness.
- Graph paper or a clipboard and pencil. You will draw a rough sketch first and write numbers on it, so it does not need to be to scale.
- A helper for long walls, or a tape with a hook you can catch on a door frame.
- Your phone, to photograph each wall. Photos settle arguments later about which side a door was hinged on.
Step 1: sketch the room before you measure
Draw the outline of the room by eye, roughly in proportion, with every jog, closet and opening in it. Mark north if you know it. Number the walls clockwise from the door (wall 1, wall 2…) and draw each door and window where it sits. Leave space beside each wall to write a string of numbers. Measuring without a sketch is the most common reason people come home with a list of figures they cannot place.
Step 2: measure each wall, corner to corner
Measure along each wall about 3 ft off the floor, above the baseboard, so you are reading drywall to drywall rather than baseboard to baseboard. Hold the tape level and tight. Measure every wall, including the one opposite a wall you already did: real rooms are rarely perfect rectangles, and a difference of ½ in or more between opposite walls tells you the room is out of square.
Write lengths in feet and inches and round to the nearest ¼ in. A floor plan drawn for furniture layout or a remodel bid does not need more precision than that; one drawn for built-in cabinetry does, so measure those walls twice.
Running vs split measurements
There are two ways to measure a wall that has a window in it. Split measurements take each piece separately: corner to window, window width, window to the far corner. Running measurements keep the tape hooked on the starting corner and read off the distance to each edge as you go.
| Point along the wall | Running (from left corner) | Split (each piece) |
|---|---|---|
| Left corner to window trim | 3' 7" | 3' 7" |
| Window right edge | 6' 7" | 3' 0" |
| Right corner | 11' 5½" | 4' 10½" |
| Total | 11' 5½" (read once) | 11' 5½" (sum of three readings) |
Running measurements are the better habit. Each split reading can be off by an eighth of an inch, and on a wall with two windows and a door those errors add up across five or six readings. A running string has only one reading per point, and the last figure is the wall length, so there is nothing to add up. Professional measurers use split figures only where a running tape cannot reach, such as around a corner of a closet.
Step 3: measure wall thickness
Room-to-room plans need the walls themselves, not just the rooms. Measure thickness at a door opening, jamb face to jamb face, or with the tape across the edge of an open doorway. As a rule of thumb, an interior 2×4 wall with ½ in drywall on both sides is about 4½ in thick. An exterior 2×6 wall with sheathing and siding is usually 6½ to 7½ in, more with brick or stucco. Old plaster walls are often thicker.
Thickness matters more than it looks. A 12 ft room drawn with zero-width walls in a row of three rooms pushes the end wall over a foot out of place once real walls are added. FloorGen's bedroom template, used below, is drawn 12 × 12 ft on its wall centrelines with 6½ in outside walls, so the inside faces of the outer walls are 11 ft 5½ in apart across the room.
Step 4: doors, windows and fixed items
For each door, record the width of the door leaf (a 32 in door is a 2/8 in the trade), which side the hinges are on and which way it swings. For each window, record the width, the height and the sill height above the floor. Then note anything fixed that a floor plan has to work around:
- Heating registers, radiators and return grilles.
- Outlets, switches and the thermostat, with their distance from a corner.
- Beams, soffits, chimney breasts and columns.
- Closet depth (a reach-in closet is usually about 24 in deep inside) and the width of its doors.
In a bedroom, also measure the window's net clear opening when it is fully open. The model code requires an emergency escape opening in sleeping rooms of at least 5.7 ft² net clear (5.0 ft² at grade), at least 24 in high and 20 in wide, with the sill no more than 44 in above the floor (2021 IRC R310 / 2024 IRC R319). What makes a room a bedroom covers the rest of those rules.
Step 5: check the diagonals
Measure from one corner to the opposite corner, then across the other way. In a true rectangle the two diagonals are equal. If they differ by more than about ½ in, the room is out of square, and a plan drawn with perfect right angles will not match it.
| Room (wall to wall) | Diagonal if square |
|---|---|
| 10 × 10 ft | 14' 1¾" |
| 10 × 12 ft | 15' 7½" |
| 12 × 12 ft | 16' 11⅝" |
| 12 × 14 ft | 18' 5¼" |
| 14 × 16 ft | 21' 3⅛" |
If the diagonals do not match, use them to place the corners: draw one wall, then find the far corner where an arc of the diagonal length from one end meets an arc of the side length from the other. This is called triangulation and is how surveyors fix a point. For most rooms in a modern house the error is small enough to ignore; in a 100-year-old house it often is not.
Step 6: ceiling height
Measure from the finished floor to the finished ceiling in two or three places, and to the underside of any beam or soffit. A laser pointed straight up makes this a one-person job. Under the IRC ceiling height rules (2021 IRC R305), habitable rooms and hallways need at least 7 ft, and bathrooms, toilet rooms and laundry rooms at least 6 ft 8 in. Sloped ceilings, basements and beams have their own exceptions, and many jurisdictions amend these figures; check them before you count a low room as habitable.
A worked example: the 12 × 12 ft bedroom
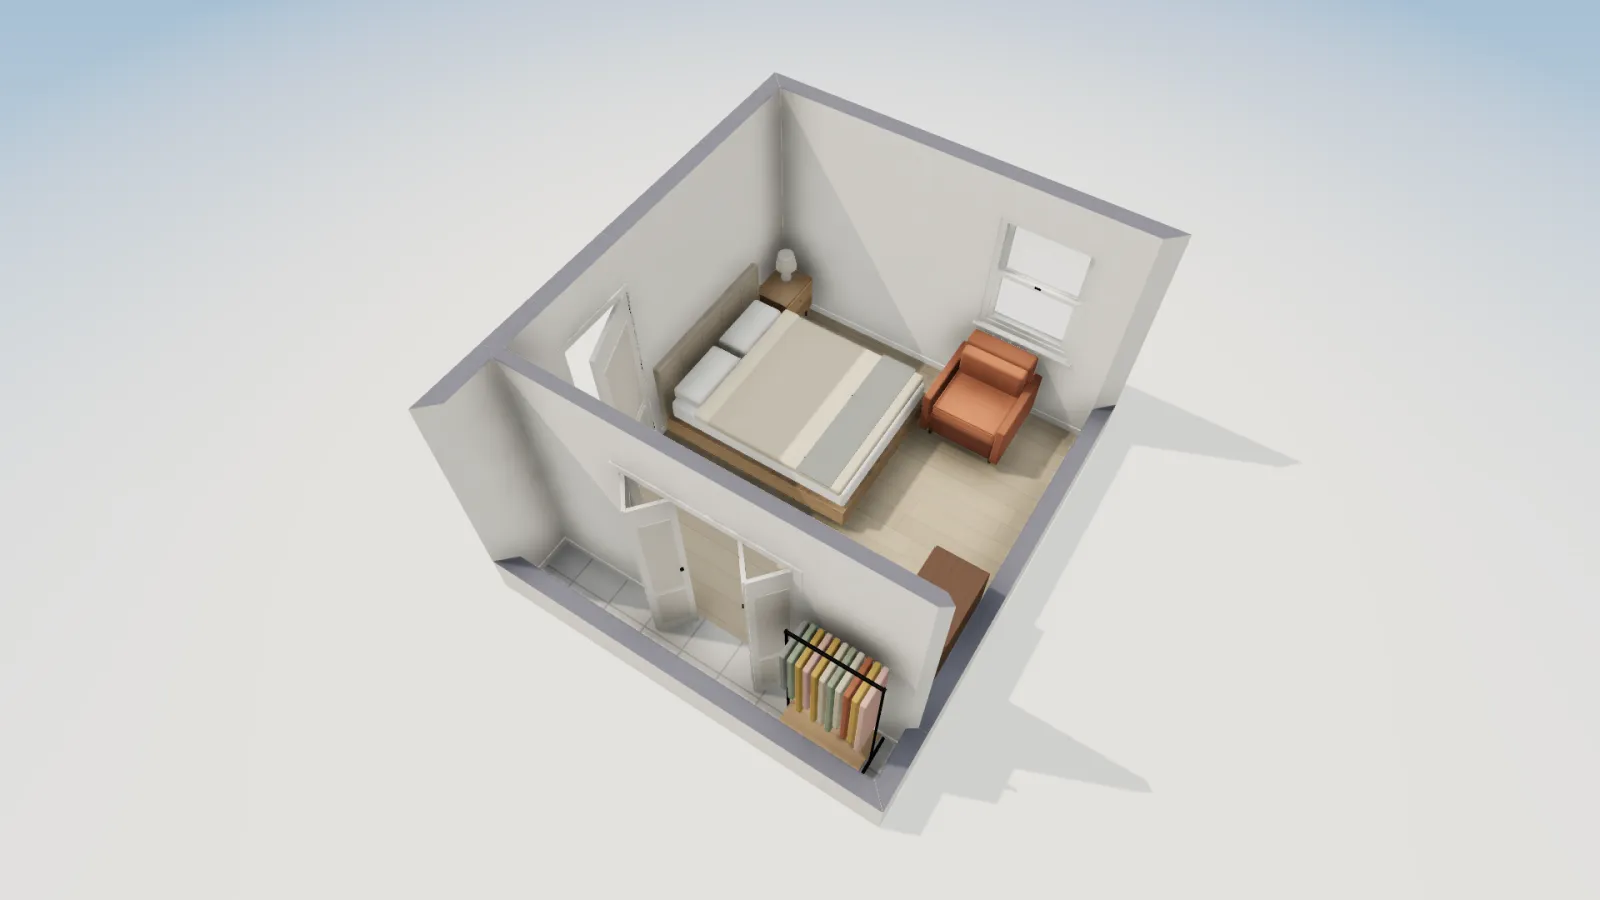
Here is what a finished measurement set looks like once it is drawn. The FloorGen bedroom template is a 12 × 12 ft room on its wall centrelines with a 2 ft deep reach-in closet along one wall, a 32 in door, two 36 in windows on adjacent outside walls, and a 60 in bifold door on the closet.
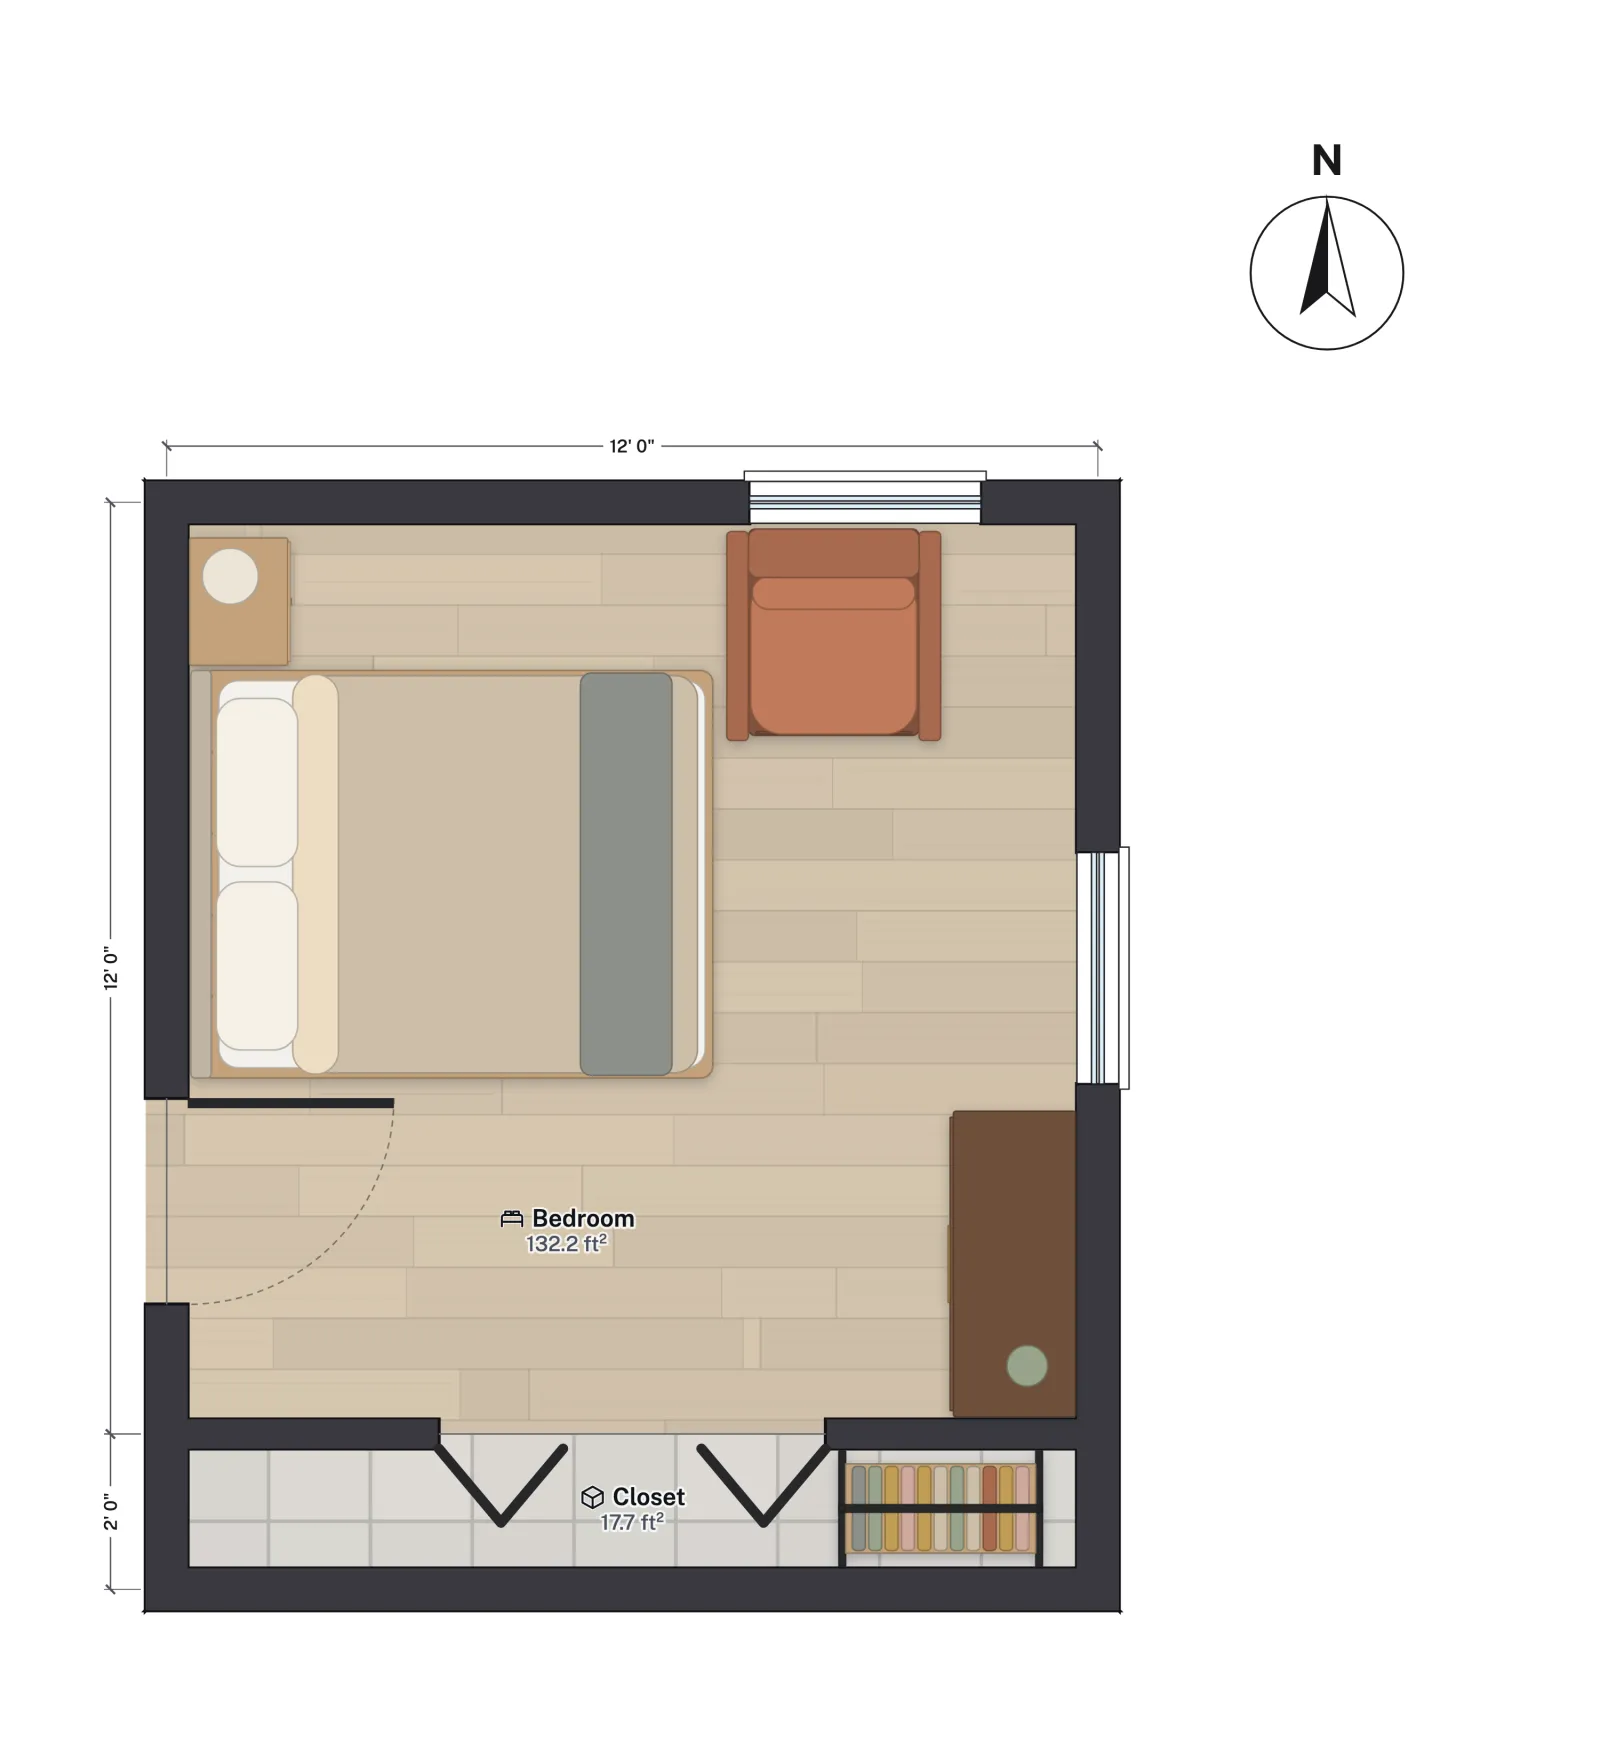
| Measurement | Value |
|---|---|
| Grid size, wall centreline to centreline | 12 × 12 ft bedroom, plus a 2 ft closet |
| Outside of the outer walls | 12' 6½" × 14' 6½" |
| Inside faces of the outer walls | 11' 5½" × 13' 5½" |
| Bedroom floor area, net | 132.2 ft² |
| Closet floor area, net | 17.7 ft² |
Note the three different sizes for the same room. The dimension strings on the plan run along wall centrelines, which is how framers lay out walls. What you measured with a tape inside the room is the inside-face size. And the net area, the figure a room label shows, is measured to the inside faces. When you compare a plan with your tape, compare like with like; how to calculate square footage explains which figure goes in a listing.
Turning your measurements into a plan
FloorGen takes these numbers directly. Set the region to United States and the project works in feet and inches, with new outside walls 6½ in thick and inside walls 4½ in (you can change both under Wall thickness). Drag a rectangle with the room tool, or draw walls corner by corner and type each length as you go, such as 11' 5 1/2", then press Enter. Place each door and window on its wall at the width you measured, flip the hinge side and swing to match your photos, and set the window Sill height. The Tape measure tool checks any distance afterwards, and the Measure to switch shows the dimension strings to the wall centrelines, the inside faces or the outside faces, so you can compare the drawing with your tape directly.
Common mistakes
- Measuring baseboard to baseboard. It makes the room ½ to 1 in smaller than it is; measure above the trim.
- Measuring only two walls. Opposite walls differ in older houses; measure all four.
- Adding up split measurements. Use running measurements from one corner.
- Forgetting wall thickness. Rooms drawn edge to edge drift out of place across a house.
- Not writing down swing and hinge side. A door drawn swinging the wrong way can hide a furniture clash.
Measuring a whole house is the same process repeated room by room, plus the outside walls; how to draw a floor plan picks up from here. If the house may already have drawings, check where to find a floor plan of your house first; once the plan is drawn, it also gives you drywall and flooring quantities.
More from the blog
Guides8 min read
How to Draw a Floor Plan: A Step-by-Step Guide (2026)
Guides6 min read
Free Floor Plan Software and Apps Compared (2026)
Guides6 min read
How to Read a Floor Plan: Dimensions, Scale and Symbols