Electrical plan maker
Draw an electrical plan on your floor plan: place outlets, switches and lights, link each switch to the lights it works, put devices on circuits with their load against the breaker, and check the light level and daylight in every room. It runs in your browser, and the layers are free with an account.
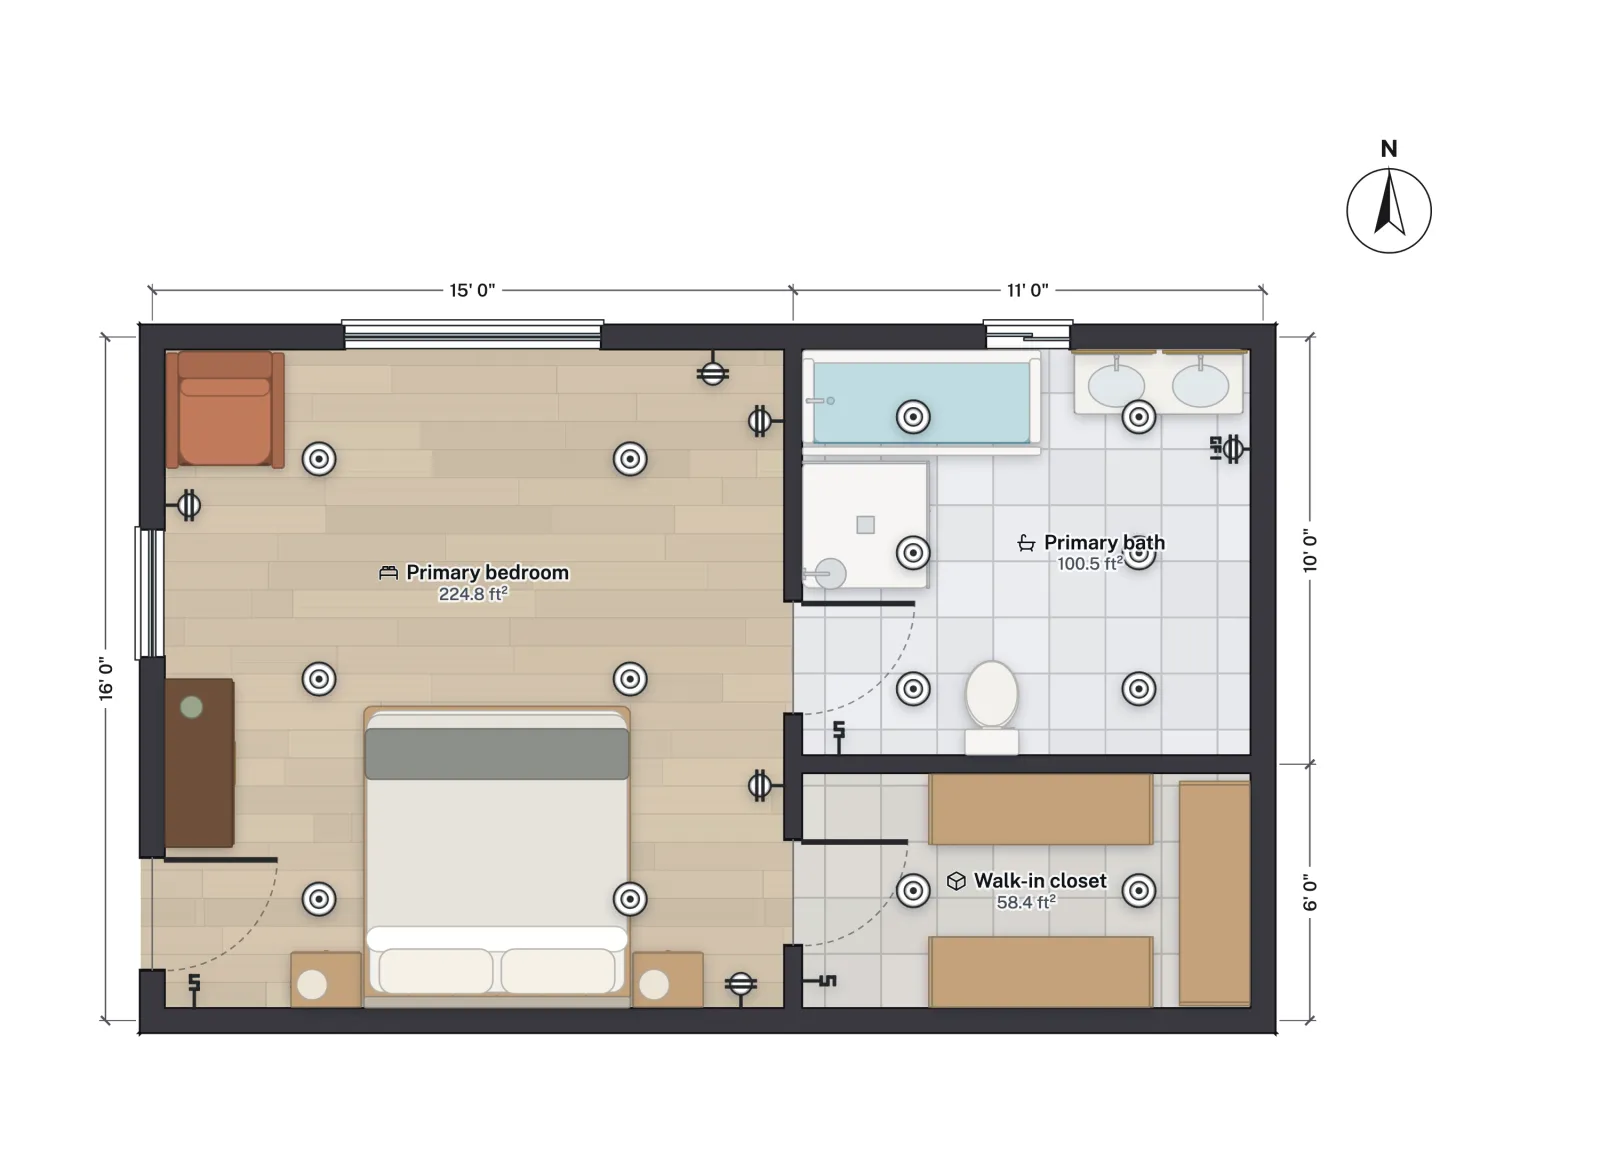
- Layers: electrical, lighting, daylight
- 3
- Breakers for your circuits
- 15 to 50 A
- Lights one switch link can work
- 60
- With an account, on every plan
- Free
Put devices on circuits and read the load
Make a circuit with a name, a breaker (15 to 50 A), 120 or 240 V, GFCI or AFCI protection and a colour. Select outlets and lights and assign them. Each circuit shows its load against its breaker: amber above 80%, red over it.
- Outlet
- 180 VA unless you set your own
- Light
- Its lumens at 80 lumens per watt
Link a switch to its lights
Select a switch, click Link lights and click each light it works. A dashed arc then runs from the switch to every light. A single-pole switch works lights from one place, two 3-way switches from two, and up to four 4-way switches between them from three to six.
See how bright each room is
The Lighting layer colours the floor by light level on a desk-high work plane and puts a badge on each room, such as 126 lx against a target of 150. Light from a lamp stays in its room, and walls stop it.
Add lights to a dark room in one click
Auto-place lights sizes a grid of recessed cans until the room meets its target and adds a switch by the door. It previews first and adds everything as one undo step. It is a rule, not AI: the same room gets the same layout, and it costs no credits.
Check the sun and sky through your windows
Pick a month and an hour from 6 am to 8 pm, or play the day. Sunny shows patches of direct sun on the floor; Overcast shows the daylight factor per room.
Print the E-sheet and the schedule
The print set has an electrical sheet (E1.0) for each floor with devices, arcs, circuit tags, a legend and the schedules, and the Schedules panel downloads the circuits and fixtures as a CSV.
The electrical tools, in detail
How to make an electrical plan
- Start from the floor plan. Open a template, trace one from an image or draw the walls and rooms. Name the rooms: the light targets follow the room type.
- Place the devices. In the library open Electrical and drag duplex, GFCI, quad, 240 V and floor outlets, single-pole, 3-way, 4-way, dimmer and smart switches, junction boxes and recessed cans onto the plan.
- Turn on the Electrical layer. Click View at the top right and switch on Electrical (or press Shift+E). Choose what it draws: wiring arcs, circuits, outlet hints, and dimmed furniture.
- Make circuits. Open the Electrical panel, click New circuit, set the breaker and voltage, select devices and click Assign selection.
- Link the switches. Select a switch, click Link lights and click the lights it works. Press Enter to save the link.
- Check the light. Switch on Lighting (Shift+L) and read each room's badge. In a room below its target, right-click it and choose Auto-place lights here.
- Check the daylight. Switch on Daylight and move the month and hour.
- Print. Open Export, then Print set, and keep Electrical sheet (E1.0) and Electrical schedule on. Or download the schedule as a CSV from the panel.
The longer walk-through with the symbols a house plan uses is in the blog post how to draw an electrical plan. The editor steps are in the electrical and lighting guide.
What it does
- Electrical symbols from the library. Outlets, switches, junction boxes and lights, with a plan symbol and a 3D model each.
- Circuits with a load. Per design, so two layouts of a floor keep their own circuits. A receptacle counts 180 VA and a light its lumens at 80 lumens per watt; set the load on a device to use your own figure.
- Switch links. One single-pole switch, a 3-way pair, or a 3-way pair with up to four 4-way switches between them, working 1 to 60 lights. Any other mix is refused with the reason.
- Light levels against targets. Lux on a work plane 75 cm up, checked per room against a rule of thumb: 300 lx for a kitchen or study, 200 for a bath, 150 for a living room, 100 for a bedroom. A room is at target, below it, or dark (under half).
- Outlet hints. On the IRC code profile the Review panel checks outlet spacing (no point on a wall more than 6 ft from an outlet) and Outlet hints draws the findings on the plan.
- Daylight. Sun patches or the overcast daylight factor through your windows, tied to the same month and hour as the 3D sun.
- Agents. An assistant connected through MCP can read and change circuits, links and light levels.
What it does not do
- It is not an electrical design and not a permit drawing. Loads, light levels, daylight and outlet hints are estimates to plan with; check them with your electrician and local code.
- It does not size wire, panels or the service, and it does not run a code load calculation. The circuit load is a simple sum against the breaker.
- Daylight leaves out eaves, trees and neighbouring buildings.
- The light targets are rules of thumb for homes (workplace levels for a clinic, classroom or salon), not a lighting standard.
- The layers change what the plan shows, never the plan itself. The wiring arcs show which switch works which light, not the path of the cable.