Measure and annotate
Updated 6 min readWorks without an account
Use the tape measure for a quick distance and a dimension for a size that follows the walls. Text notes and a north arrow explain the plan to whoever reads it.
Measure a distance
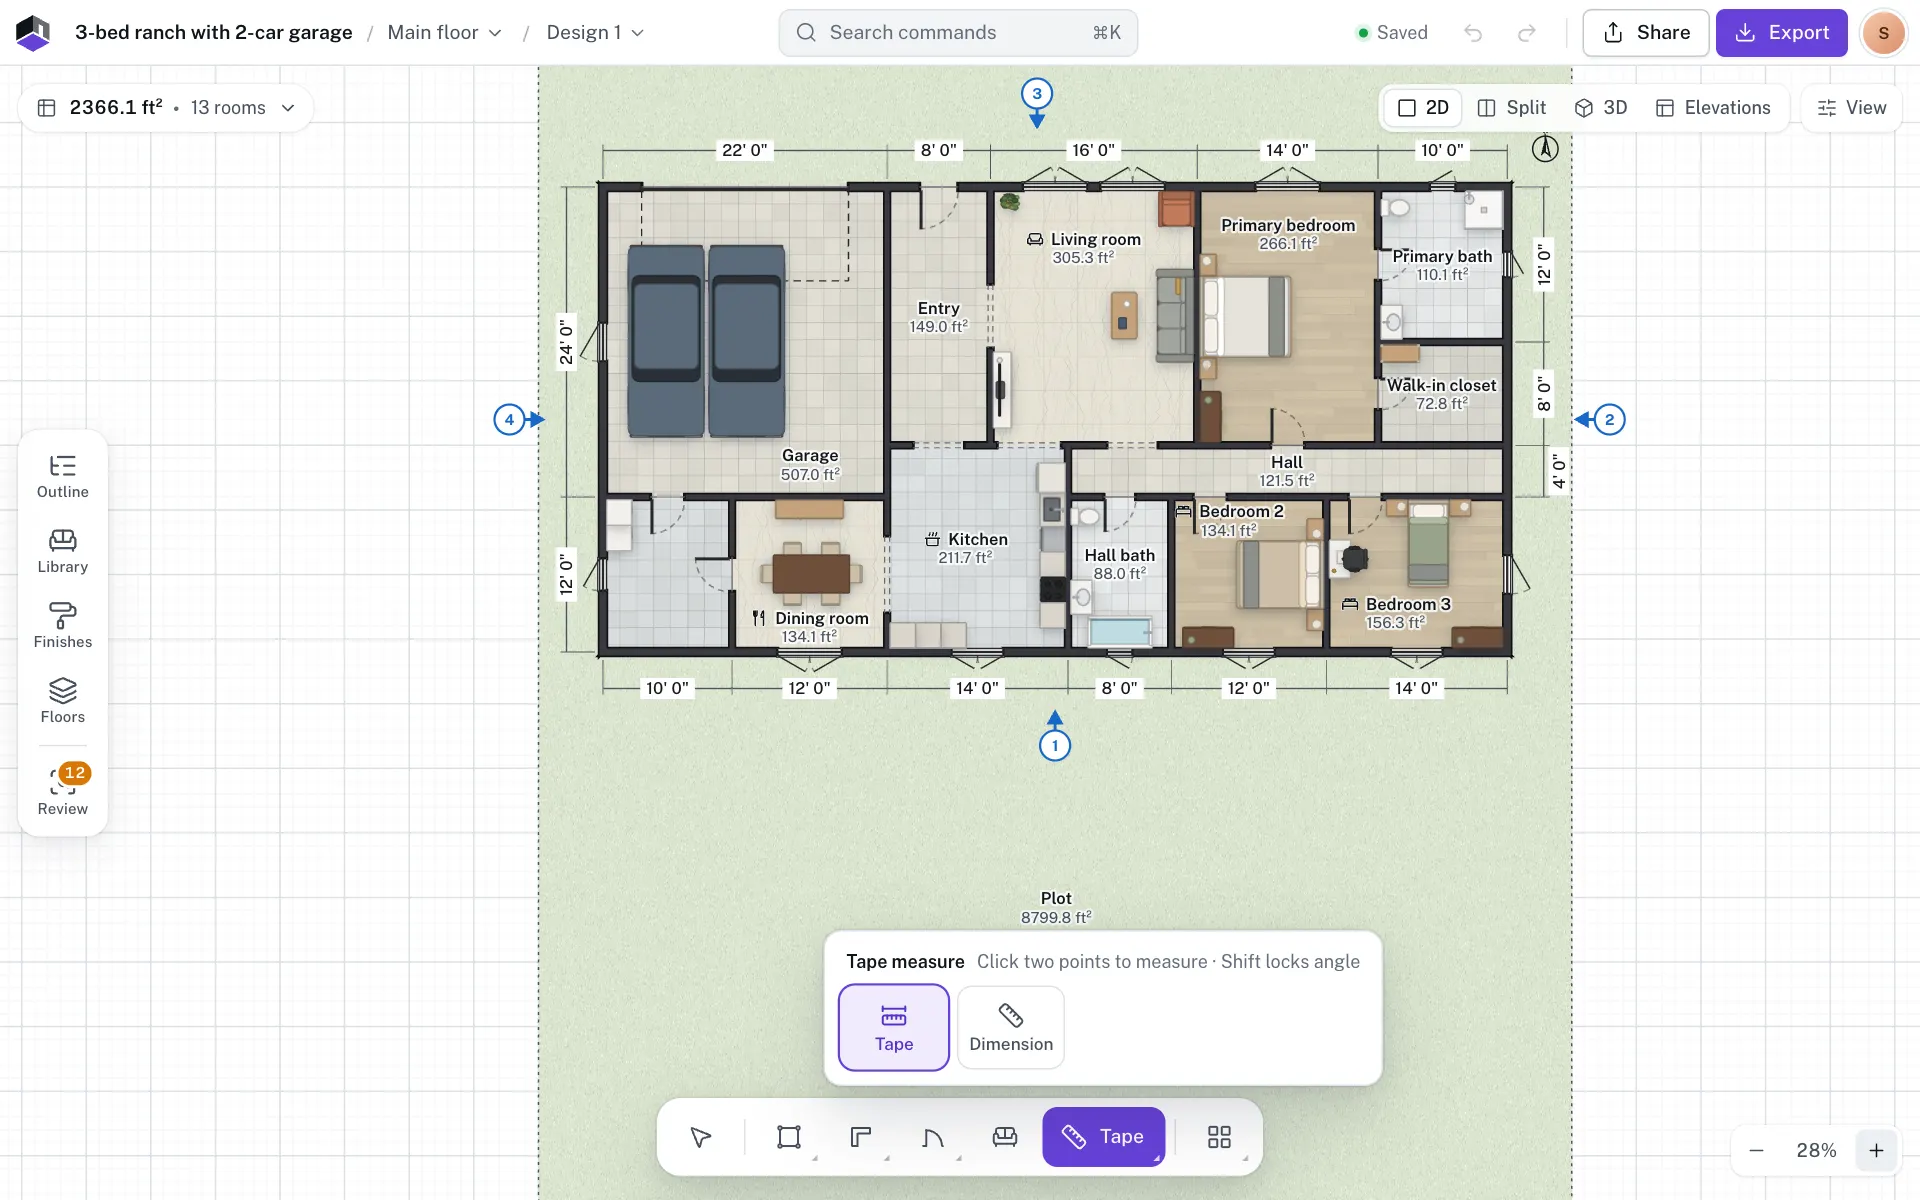
- Step 1: Pick Measure
Press M, or click Measure in the tool dock.
- Step 2: Choose Tape or Dimension
The options above the dock offer Tape for a quick measurement and Dimension for one that follows the walls.
- Step 3: Click two points
Click the start and the end, or press, drag and let go. The tape snaps to corners, wall faces and furniture, and to the grid while Snap to grid is on. Hold ⇧ to lock the angle to 45° steps, or ⌥ to measure freely with no snapping.
- Step 4: Chain on, if you need to
To carry on from the end, press ↵ or double-click the end point, then click each further point. ↵, a double-click or a right-click finishes the chain.
- Step 5: Pin it to the plan
Press P, or click Pin, to keep the measurement on the plan.
- Lengths show in the project’s units. The chip beside the end shows the length, or Total and the number of parts for a chain, with Pin and a × (Clear measurement).
- Pinning a chain pins each part as its own measurement. A message with Undo says how many, such as 3 measurements pinned to the plan.
- A new tape measurement replaces the last one unless you pinned it.
- Right-click while measuring for the Tape measure menu: Pin measurement (P), Clear measurement (Esc) and Zoom to fit.
Dimensions that follow the walls
Press ⇧M, click a wall or a piece of furniture, then click a second one. Whatever is under the pointer is outlined, and a dashed preview shows the length. The new dimension is selected and the tool goes back to Select. The dimension re-measures every time the things it is attached to move. Esc or another tool drops a half-made one.
- Clicking empty space says Click a wall or a piece of furniture; clicking the same thing twice, or two things that touch, says Pick a different wall or piece of furniture.
- Follows the plan means it is attached. Dragging an end or the whole dimension cuts it loose; Detach does the same.
- For a pinned tape measurement, Attach to walls and furniture makes it follow the things its ends sit on.
- Drag the round ends to measure something else, or drag the line to move it aside. Move the line back onto the points puts it back.
Measurement properties
Click a pinned measurement or a dimension to select it. Its pill and right-click menu have Duplicate, All properties and Delete; the arrow keys nudge it and Del deletes it.
| Field | What it does |
|---|---|
| Reading | Length, Angle, Across (Δx) and Down (Δy). Read only: drag the ends on the plan to change them. |
| Follows the plan | Detach cuts an attached dimension loose; Attach to walls and furniture attaches a loose one. If neither end sits on a wall or a piece of furniture, it says so. |
| Units | Metric or Imperial for the whole project, not this measurement alone. See Language and units. |
| Move the line back onto the points | Shown after you dragged the line aside; puts it back between the two ends |
Wall dimensions and where they measure to
Turn Wall dimensions on or off in View options at the top right. Measure to in the account menu’s Project details, under Dimensions and measurements, sets what wall lengths measure:
| Choice | What it measures |
|---|---|
| Centre | To the wall centrelines |
| Inside | Clear sizes, between the inner wall faces |
| Outside | Overall sizes, to the outer wall faces |
Rulers in View options frame the plan with rulers and an X/Y readout of the pointer: On hover (the default) shows them when the pointer nears the plan’s top or left edge, Always keeps them, and Off hides them.
Text notes
- Step 6: Pick Text note
Press T, or choose Text note in More tools.
- Step 7: Click and type
Click where the note goes and type in the Type a note box. ↵ starts a new line. Press ⌘↵ or click away to save; Esc cancels. The tool goes back to Select after each note.
- Step 8: Style it
Double-click a note to edit its text. Select it for its properties: the text, the look, a leader arrow and a lock.
| Field | What it does | Range | Default |
|---|---|---|---|
| Text | The words; saved when you click away | Up to 5,000 characters | |
| Text, Sticky | Under Look: plain text or a coloured sticky note | Text | |
| Text height | The letter size on the plan | 1 to 1,000 cm | 14 cm |
| Colour swatch | Under Look, for a sticky note only: the note’s colour | Any colour | Pale yellow |
| Leader arrow | Add arrow draws an arrow from the note; drag its round handle to point at something. Remove arrow takes it off. | No arrow | |
| Lock | Stops the text and arrow being changed and the note being deleted | Off |
A locked note ignores clicks on the plan. To unlock it, open the Outline, find it under Notes and click its padlock. See Layers and the Outline.
North arrow
- Step 9: Turn it on
Open the account menu › Project details and turn on North arrow under Notes and north. The arrow appears outside the top-right corner of the plan.
- Step 10: Point it north
Type the angle in North points, or drag the arrow’s round handle on the plan (hold ⌥ to turn freely). The 3D sun uses the same north.
- Step 11: Move or remove it
Drag the arrow, or select it and nudge it with the arrow keys. Remove north arrow or Del takes it off; the message has Undo.
| Field | What it does | Range | Default |
|---|---|---|---|
| North points | Which way north is, in degrees clockwise from the top of the plan. Also in Project details while the arrow is on. | −360° to 360° | 0° (north is up) |
| Remove north arrow | Takes the arrow off the plan |
To cut a section through the building, press X. See Section view.
On a phone or tablet
Tap Measure in the tool dock, then tap two points, or drag from one to the other. Pin keeps the measurement on the plan.
Questions
Why did my measurement disappear?
A new tape measurement replaces the last one unless you pin it. Press P or click Pin before you start the next one.
Can one dimension show feet while the plan is metric?
No. The Units switch in a measurement’s properties changes the units of the whole project, and every measurement follows them.
How do I put a dimension line back after dragging it aside?
Select it and click Move the line back onto the points in its properties.
Do notes show on the exported plan?
Yes, while Print notes and north arrow is on, which it is by default. They never show in the 3D view.