Draw walls
Updated 9 min readWorks without an account
Press W and click from corner to corner. Each new wall starts where the last one ended, and when the walls close a loop they become a room.
Draw walls
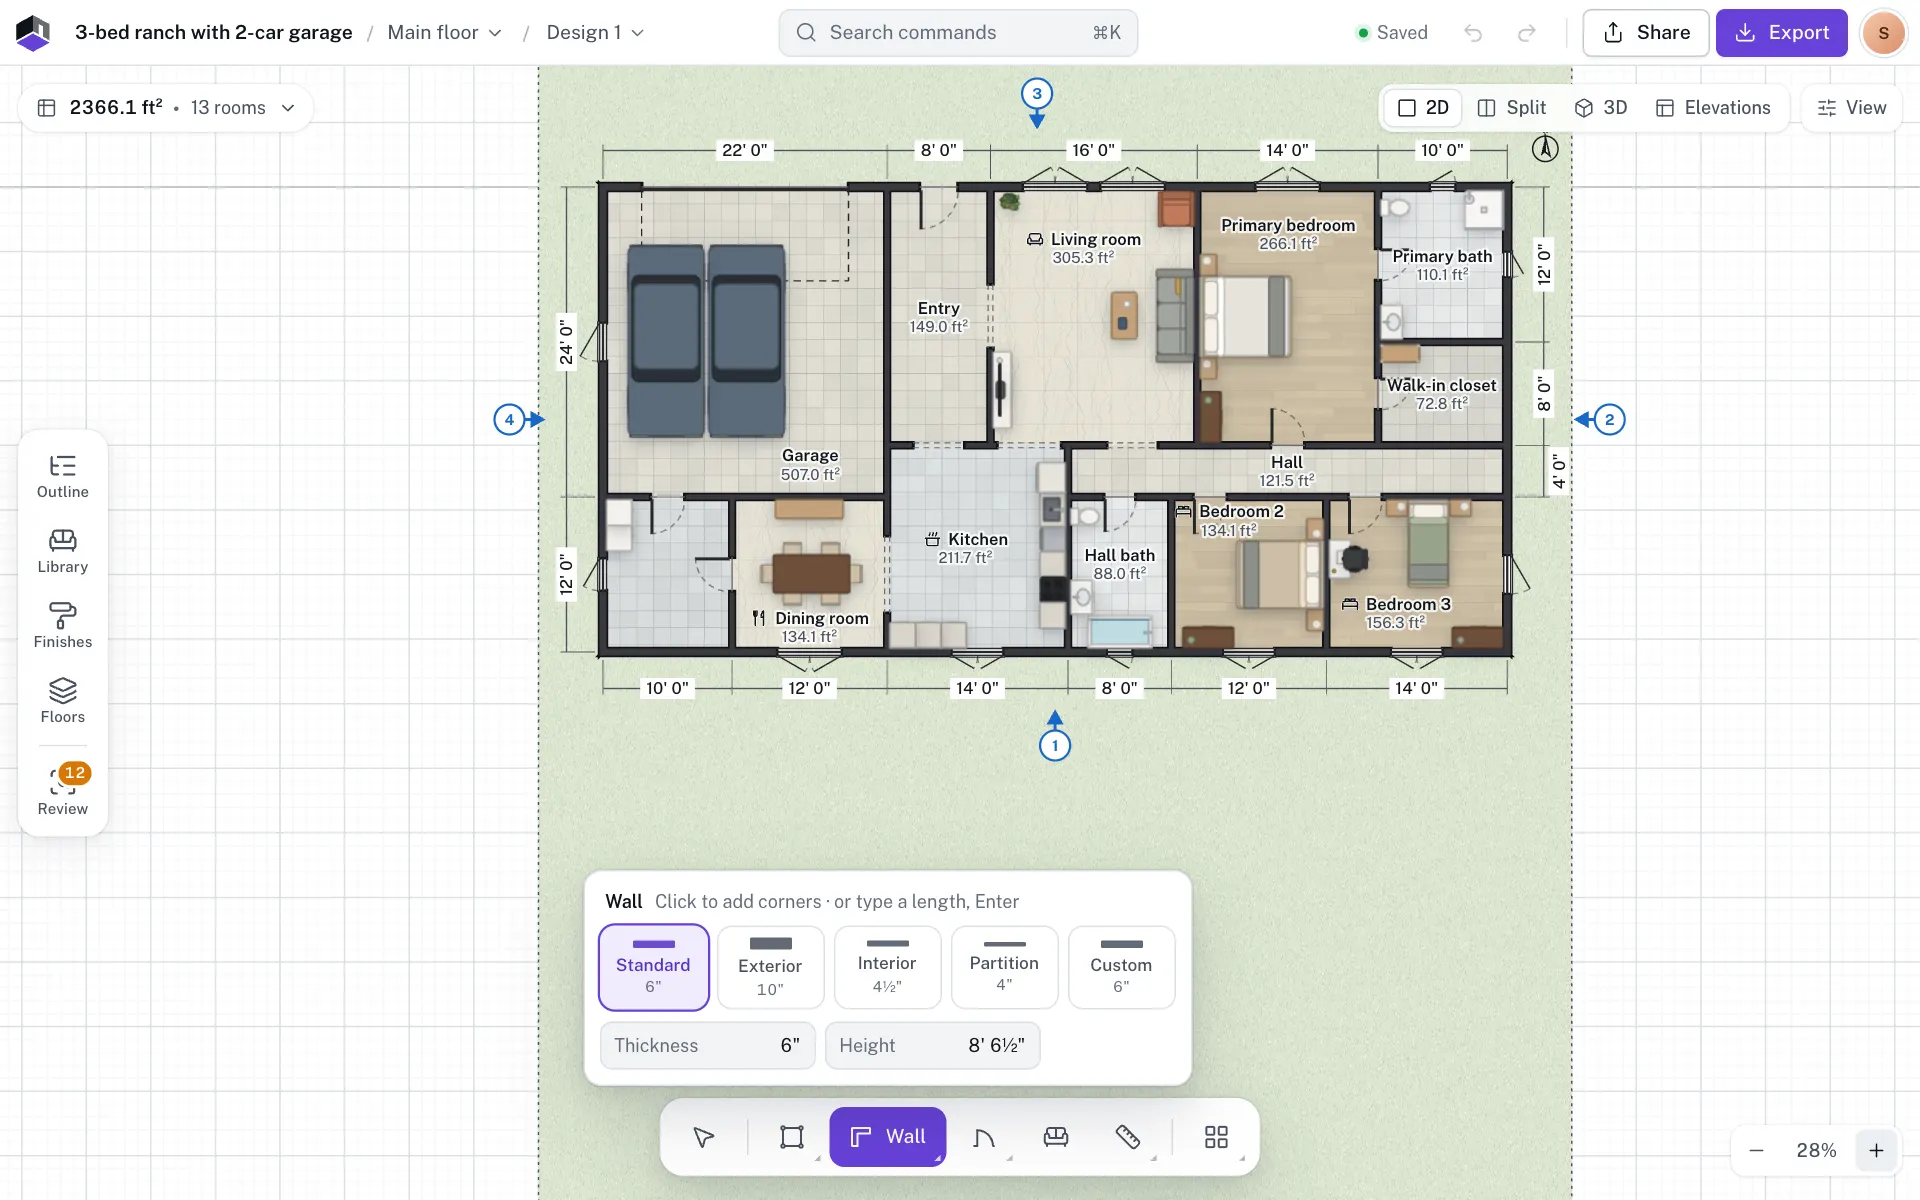
- Step 1: Pick the Wall tool
Press W, or click Wall in the tool dock at the bottom of the screen.
- Step 2: Choose a thickness preset
The options above the dock offer Standard, Exterior, Interior, Partition and Custom. Each tile shows its thickness. Set Thickness and Height there for the walls you are about to draw; typing a thickness picks Custom.
- Step 3: Click corner to corner
Click where the wall starts, then click each corner. Walls snap to corners, other walls, the grid and 15° steps. Hold ⇧ to keep a wall horizontal or vertical, or ⌥ to draw without snapping. The plan shows the length and angle of the wall to the pointer.
- Step 4: Type exact lengths
While drawing, type a length such as
350cm,3.5mor12'6". Press Tab to type an angle, then ↵ to place the wall. - Step 5: Finish the chain
Double-click the last corner, right-click, or press ↵ with nothing typed. Clicking onto a wall or wall end that is already there also ends the chain, and the next click starts a new one.
The angle box (angle °) takes degrees clockwise from the right: 0 points right and 90 points down the screen. -30, 45° and 270 deg all work. Leave it empty and the wall goes towards the pointer. Lengths show in the project’s units.
| Key | What it does |
|---|---|
| W | Pick the Wall tool |
| 0 to 9 | Type a length |
| Tab | Move on to the angle |
| ↵ | Place the typed wall, or finish the chain. With only the first corner down, it opens the length box. |
| ⇧ (hold) | Keep the wall horizontal or vertical |
| ⌥ (hold) | Draw without snapping |
| Backspace | Remove the last corner and the wall it made |
| Esc | Stop drawing. The walls already placed stay. Press it again to go back to the Select tool. |
Thickness presets
The presets set only the thickness. A wall keeps no type, and its height is set apart. Standard is the Wall thickness in Settings (⌘,) › Drawing. Exterior, Interior and Partition come from the project’s Region, and there is no field for each one. Picking a region also sets Wall thickness to its interior wall.
| Preset | Other / generic region | United States and Canada |
|---|---|---|
| Standard | 12 cm (Wall thickness, 2 to 200 cm) | 11.5 cm (4½ in) |
| Exterior | 25 cm | 16.5 cm (6½ in) |
| Interior | 12 cm | 11.5 cm (4½ in) |
| Partition | 10 cm | 9 cm (3½ in) |
| Custom | The thickness you type | The thickness you type |
When a wall is refused or merged
- A wall that would cut through a door or window is refused with Walls can't cross a door or window, and the chain stays where it was.
- Walls never double up. A stretch that already has a wall is skipped, and when nothing is left you see There's already a wall there.
- A wall drawn across other walls splits them where they cross. Every room it closes gets a name: Room 1, Room 2 and so on, the lowest number not in use.
Change a wall
Drag a wall to move that piece. Walls that meet it at an angle stretch to follow. Drag a round end handle to move the joint, and every wall joined there follows. To type exact values, select the wall: its card shows Length (L), Thickness (T), Height (H) and Thickness preset. All properties (↵) has the rest.
| Field | What it does | Range | Default |
|---|---|---|---|
| Length, Length (inside) or Length (outside) | The name follows the project’s Measure to setting. The A end stays put and the B end moves. Walls that meet the B end at right angles slide along, so corners stay square. An edit that would break a room is refused, and doors or windows that no longer fit are narrowed (1 opening narrowed to fit, with Undo). | 10 cm to 100 m | As drawn |
| Thickness | A wall is stored as its centre line, so it grows equally on both faces. There is no setting to keep one face in place. Hidden for an invisible divider. | 2 to 200 cm | The preset you drew with |
| Height | How tall the wall is. The field stops at its floor’s storey height. See Heights and levels. | 30 cm to the storey height | Settings › Drawing › Wall height, set by the Region: 260 cm for Other / generic, 8 ft for the US and Canada |
| Thickness preset (card) | Sets the thickness to Standard, Exterior, Interior or Partition. It reads Custom when the wall matches none. | ||
| Angle (All properties › Geometry) | Degrees clockwise from the right. The wall turns about its A end, and walls joined at the B end follow. | Shows 0 to 359°; you can type −360 to 360 | As drawn |
| End points: A X, A Y, B X, B Y | The exact plan position of each end. Walls joined at an end follow it. A wall that would get too short is refused with That would make the wall too short. Read-only while the wall is locked. | ±1 km | As drawn |
| Move or copy › Distance | Move up, Move down, Move left or Move right moves the wall like a drag. Copy with a direction adds a parallel wall of the same build. Below the buttons, Clear to the wall left: (and the other side) gives the gap to the nearest parallel wall. | 1 cm to 50 m | 10 cm |
| Invisible divider | Splits a space into two rooms without a wall: dashed on the plan, not built in 3D. | On or off | Off |
Change a wall’s height
- Step 6: Select the wall
Press V and click the wall. To change several, see the next step.
- Step 7: Type the height
Type the new value in Height (H) on its card and press ↵. A value taller than the storey height, or under 30 cm, shows a hint and goes back.
- Step 8: Change many walls at once
Right-click an empty part of the plan and choose Select by type › All walls or Exterior walls. You can also right-click a wall for Select connected walls or Select this wall run, or a room for Select room walls. In All properties, the Walls (4) section has Height and Thickness. Fields that differ show Mixed; a typed value sets every wall in one step.
To go taller than the storey, raise the storey height first. Raising it does not change the walls already drawn, so change them afterwards. In 3D, Whole building and Walk draw the walls of a floor with a floor above up to its storey height, whatever their own Height. Heights and levels walks through it.
The wall’s right-click menu
| Entry | What it does |
|---|---|
| Split wall here | Splits the wall where you right-clicked (from the pill, where you clicked to select it). Too near an end or a door or window, it says Can't split the wall there: too close to an end or a door or window. |
| Make invisible divider / Make solid wall | Turns the wall into a divider, or back. |
| Add door here, Add window here | Puts a door or window where you right-clicked. |
| Thickness · 15 cm › | 10, 15, 20, 25 or 30 cm (imperial: 4, 6, 8, 10 or 12 in). The current one is ticked. Greyed out for a divider: Dividers have no thickness. |
| Height · 2.60 m › | 240, 250, 260, 270, 280 or 300 cm (imperial: 8, 9, 10 or 12 ft), only those up to the storey height. The current one is ticked. |
| Select connected walls, Select this wall run | Selects every wall joined to this one, or the straight run it is part of. |
| Elevation of this side | Opens an elevation square to an outside wall. |
Niches and bay windows
In the Library, Structure › Niches & built-ins has Wall niche (recess) and Bay window (bump-out). Drop one on a wall and the wall takes a jog: a niche is 90 × 25 cm, a bay 240 × 60 cm. Select its front wall and All properties opens with a Wall niche or Bay window section. Width (40 to 2000 cm) runs along the wall about its centre, and Depth (10 to 500 cm) is how far it juts out. The walls beside it give way.
Gaps and upper floors
When a wall end stops a little short of another wall, a Close gap badge appears on the plan. Click it to join the two. On an upper floor the walls of the floor below show faintly (View options › Floor below, faintly) and new walls snap to them. Walls that drift off the floor below get a badge with Snap this wall or Snap all to below.
To paint a wall or give it a brick or plaster texture, see Finishes and wall paint.
Questions
How do I draw a wall of an exact length?
Start the wall, type the length with its unit, such as 350cm or 12ft, and press ↵. To change a wall you already drew, select it and type the length on its card.
How do I make a wall taller?
Select it, type the new Height on its card and press ↵, or right-click it and pick a value under Height. Height and its presets stop at the storey height, so raise Storey height first if you need to. See Heights and levels.
How do I change the height of every wall?
Right-click an empty part of the plan, choose Select by type › All walls, open All properties (↵) and type the Height once. It reads Mixed until you do.
Which side gets thicker when I change the thickness?
Both. A wall is drawn on its centre line, so the thickness grows the same amount on each face.
Which end moves when I change the length?
The B end. The A end stays put; End points in All properties shows which is which.
Why does the length on the card say inside or outside?
Lengths follow the project’s Measure to setting: to the wall centre, the inside face or the outside face. The field is named to match, for example Length (inside).
How do I remove the last corner I clicked?
Press Backspace while drawing. After the wall is placed, press ⌘Z (Ctrl+Z on Windows).
Why won’t my walls make a room?
The walls must close a loop. Look for a Close gap badge on the plan and click it to join the open end.