Kitchens, wardrobes and room sets
Updated 5 min readWorks without an account
Kitchen runs, wardrobes, closet systems and vanities behave like fitted units: change the width and the doors, shelves and sinks re-flow to fit. Room sets furnish a whole room in one step.
Draw a kitchen run
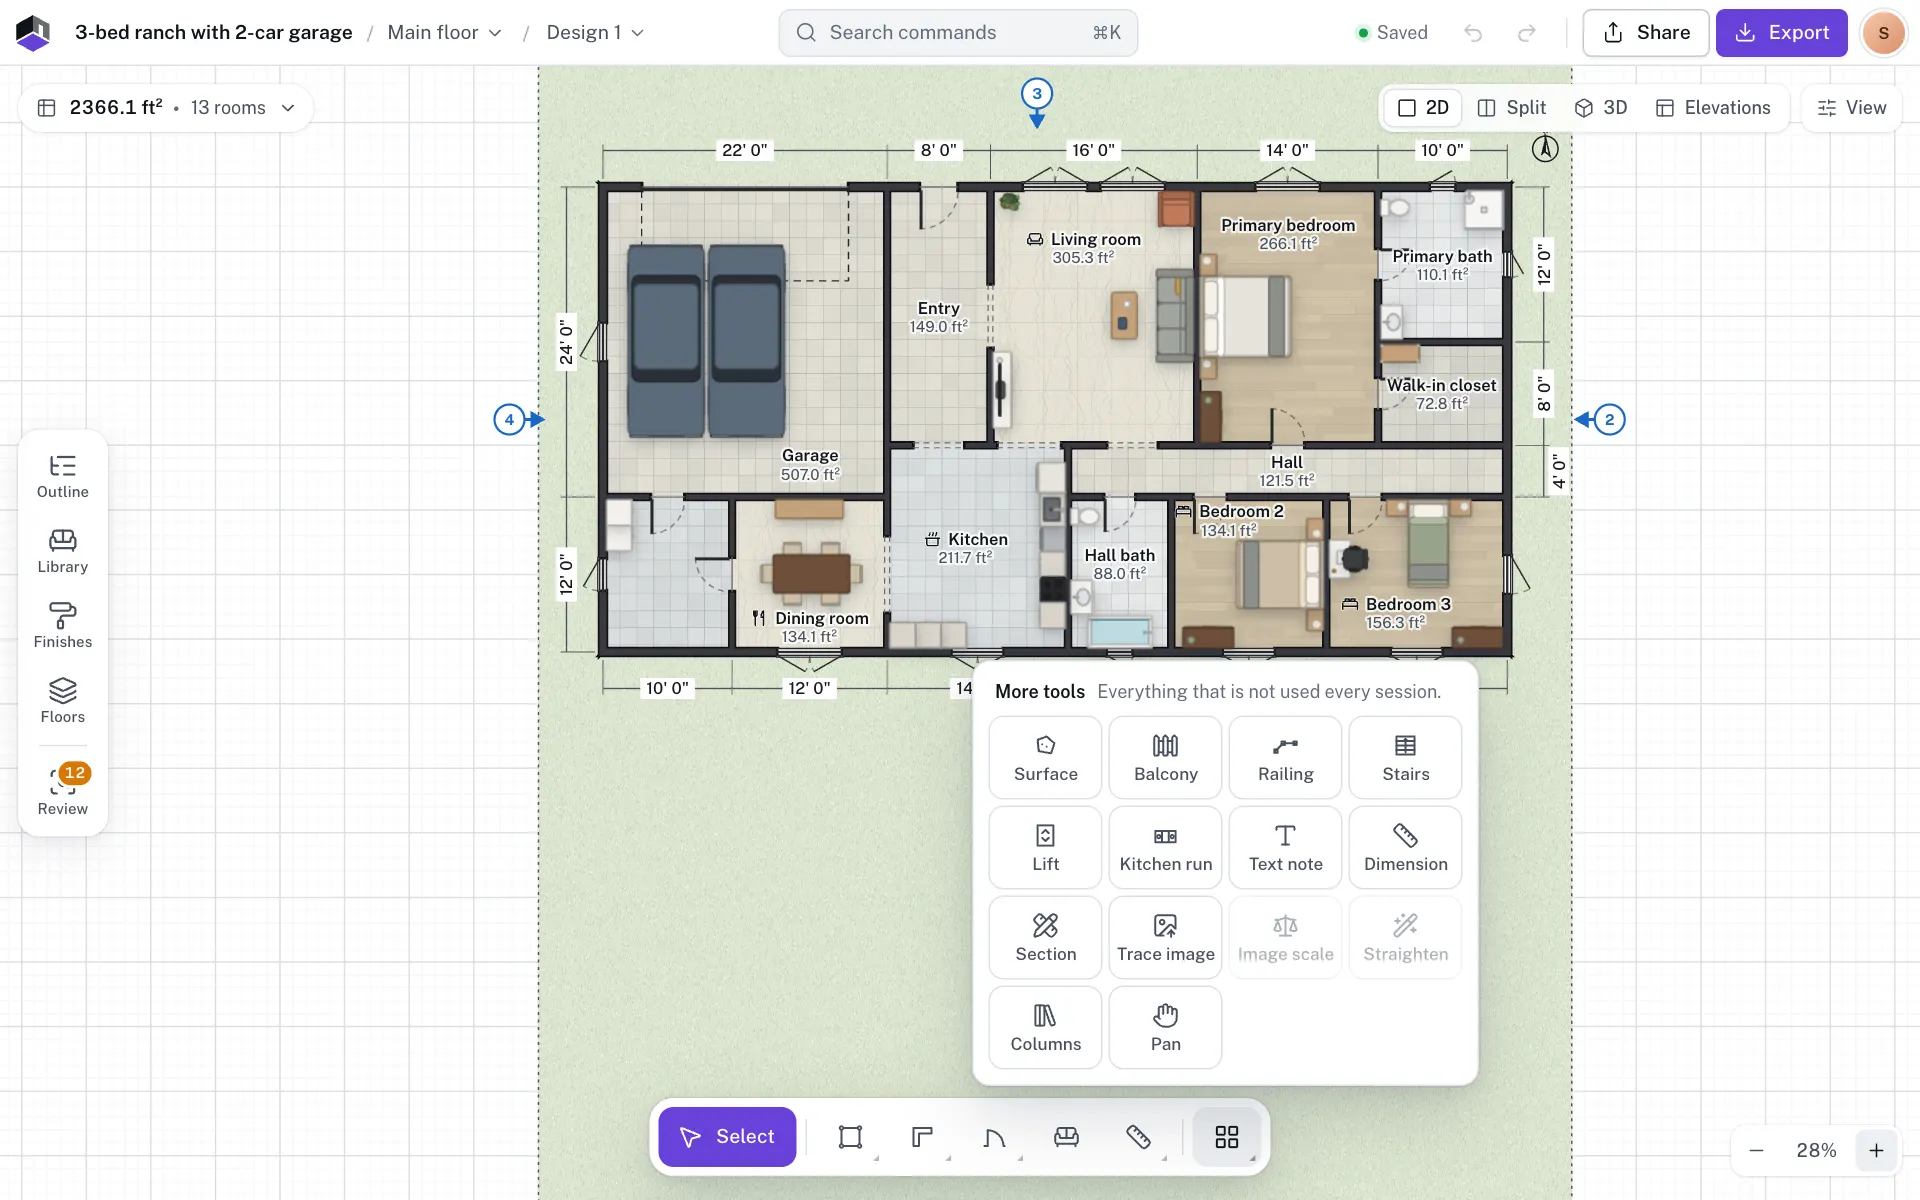
- Step 1: Open More tools
Click More tools in the tool dock, or press J to start a kitchen run straight away.
- Step 2: Pick Kitchen run
Click Kitchen run.
- Step 3: Drag along a wall
Press beside a wall and drag along it. The run fills in with base units, a worktop and a plinth.
- Step 4: Add the sink and hob
Press ↵ for All properties. Under Kitchen run, the Sink, Hob and Tall unit buttons add or remove each one, and Wall units adds the upper cabinets.
- Step 5: Stretch it
Drag a handle on the plan, or type the Total length, and the units re-flow.
The Library also has Kitchen run (fits to wall), 240 × 60 cm and 90 cm tall when placed, and no longer than the wall it fits to. For an L or U kitchen, draw one run along each wall.
Kitchen run settings
Select the run and open All properties. Lengths show in the project’s units; the values below are in cm.
| Field | What it does | Range | Default |
|---|---|---|---|
| Total length | The run’s length. Typing it keeps one end where it is and grows or shrinks the run from the other. Base units re-flow to about 60 cm each (30 to 90 cm). | 40–1500 cm | 240 cm, or as long as you drag it |
| Sink | Adds or removes an 80 cm sink unit, placed 30% of the way along the run | + adds it, − removes it | None |
| Hob | Adds or removes a 60 cm hob unit, placed 65% of the way along | + adds it, − removes it | None |
| Tall unit | Adds or removes a 60 cm full-height unit at the end of the run that stays put | + adds it, − removes it | None |
| Wall units | Adds a row of upper cabinets, 70 cm tall and 35 cm deep, with a hood over the hob | On or off | Off |
| Handles | Door and drawer handles | Bar handles, Knobs or Push to open | Bar handles |
- The line under Total length sums the run up, for example “4 units · sink, hob”.
- If the run is too short for a sink, hob or tall unit, a message says so, such as This run is too short for a sink.
- Turning on Wall units, or adding a tall unit, makes the run 215 cm tall. Turning them off again sets it back to 90 cm. Either way it replaces a height you typed. Wall units only show when the run is at least 210 cm tall, and a tall unit at least 150 cm.
- All the cabinets share one colour: set it with Colour and Material under Appearance. The stone worktop, the metal handles and the dark plinth keep their own colours and can’t be changed.
Wardrobes, closets and vanities
Search the Library for Wardrobe (custom), Closet system (custom) or Vanity (custom). Place it, set its width, and choose the options in All properties:
| Unit | Options | How the size works | Size when placed |
|---|---|---|---|
| Wardrobe (custom) | Doors: Hinged doors (default), Sliding doors, Mirror doors or Open (no doors). Handles: Bar handles (default), Knobs or Push to open. Inside: Hanging rails (default), Shelves or Drawers + rail. Loft cupboard on top (off by default). | About one door per 50 cm of width, up to 12 (sliding doors: at least two). The height sets the shelves and rails. A loft needs a height of at least 203 cm; the panel says Make it taller than 2 m to fit a loft. | 150 × 60 cm, 220 cm tall |
| Closet system (custom) | Inside: Mixed (hanging, shelves, drawers) (default), Double hanging, Long hanging, Shelves or Drawers + shelves. Continuous top shelf (on by default). | About one section per 75 cm of width, up to 12. | 240 × 60 cm, 213 cm tall |
| Vanity (custom) | Base: Doors (default), Drawers, Floating (wall-hung) or Open shelf. Sinks: From the width (default), One sink or Two sinks. Top: Stone top (default) or Wood top. | Set to From the width, it takes two sinks from 120 cm wide. Two sinks needs at least 90 cm. | 122 × 56 cm, 86 cm tall |
Set the width, depth and height of any fitted unit on its card or under Size, like any piece. To raise one off the floor, see Heights and levels.
Furnish a room in one step
- Step 6: Select the room
Click the room and press ↵ for All properties.
- Step 7: Pick a set
Under Furnish this room, click Bedroom, Living room, Office or Kids room. The set goes against the walls, clear of door swings, with tall pieces kept off the windows.
- Step 8: Try another layout
Click Shuffle layout for another arrangement, or Remove to take the set away. The whole set undoes in one step.
The same choices are on right-click: Furnish as, Shuffle furniture layout and Remove furnishing.
Save your own set
- Step 9: Select the pieces
Select the furniture you arranged.
- Step 10: Save it
Right-click and choose Save as furniture pack. It is saved as My pack 1, My pack 2 and so on.
- Step 11: Place it
Select a room and open All properties. Under Furnish this room › My packs, click Place beside the pack. It is also under My packs on the room’s right-click menu.
- Step 12: Rename or delete it
Type a new name in the pack’s field under My packs (up to 60 characters), or click the bin beside it to delete it.
You can keep up to 50 packs. Packs are kept in this browser only, not in the project, so they don’t follow your account to another browser or device.
Questions
How do I make an L-shaped kitchen?
Draw one kitchen run along each wall. Each run fits its own wall, and you can stretch either one.
Why does my wardrobe have no loft cupboard?
Turn on Loft cupboard on top. The loft needs a wardrobe at least 203 cm tall, so raise its Height if it still doesn’t show.
Why did my kitchen run get taller?
Turning on Wall units or adding a Tall unit sets the run to 215 cm so they fit. Turn both off and it goes back to 90 cm.
How do I change the kitchen cabinet colour?
Select the run, open All properties and pick a Colour under Appearance. It colours every cabinet front and body. The worktop and handles stay as they are.
Can I change the room set’s furniture afterwards?
Yes. The pieces are ordinary furniture. Move, replace or delete any of them.