The Settings dialog
Updated 6 min readWorks without an account
Open Settings… from the account menu or with ⌘,, or Ctrl+, on Windows. It has four tabs: Region, Units, Drawing and Interface. Each group says whether its values are saved in the project or remembered in this browser, and changes apply as you make them.
Open Settings
- Step 1: Open the dialog
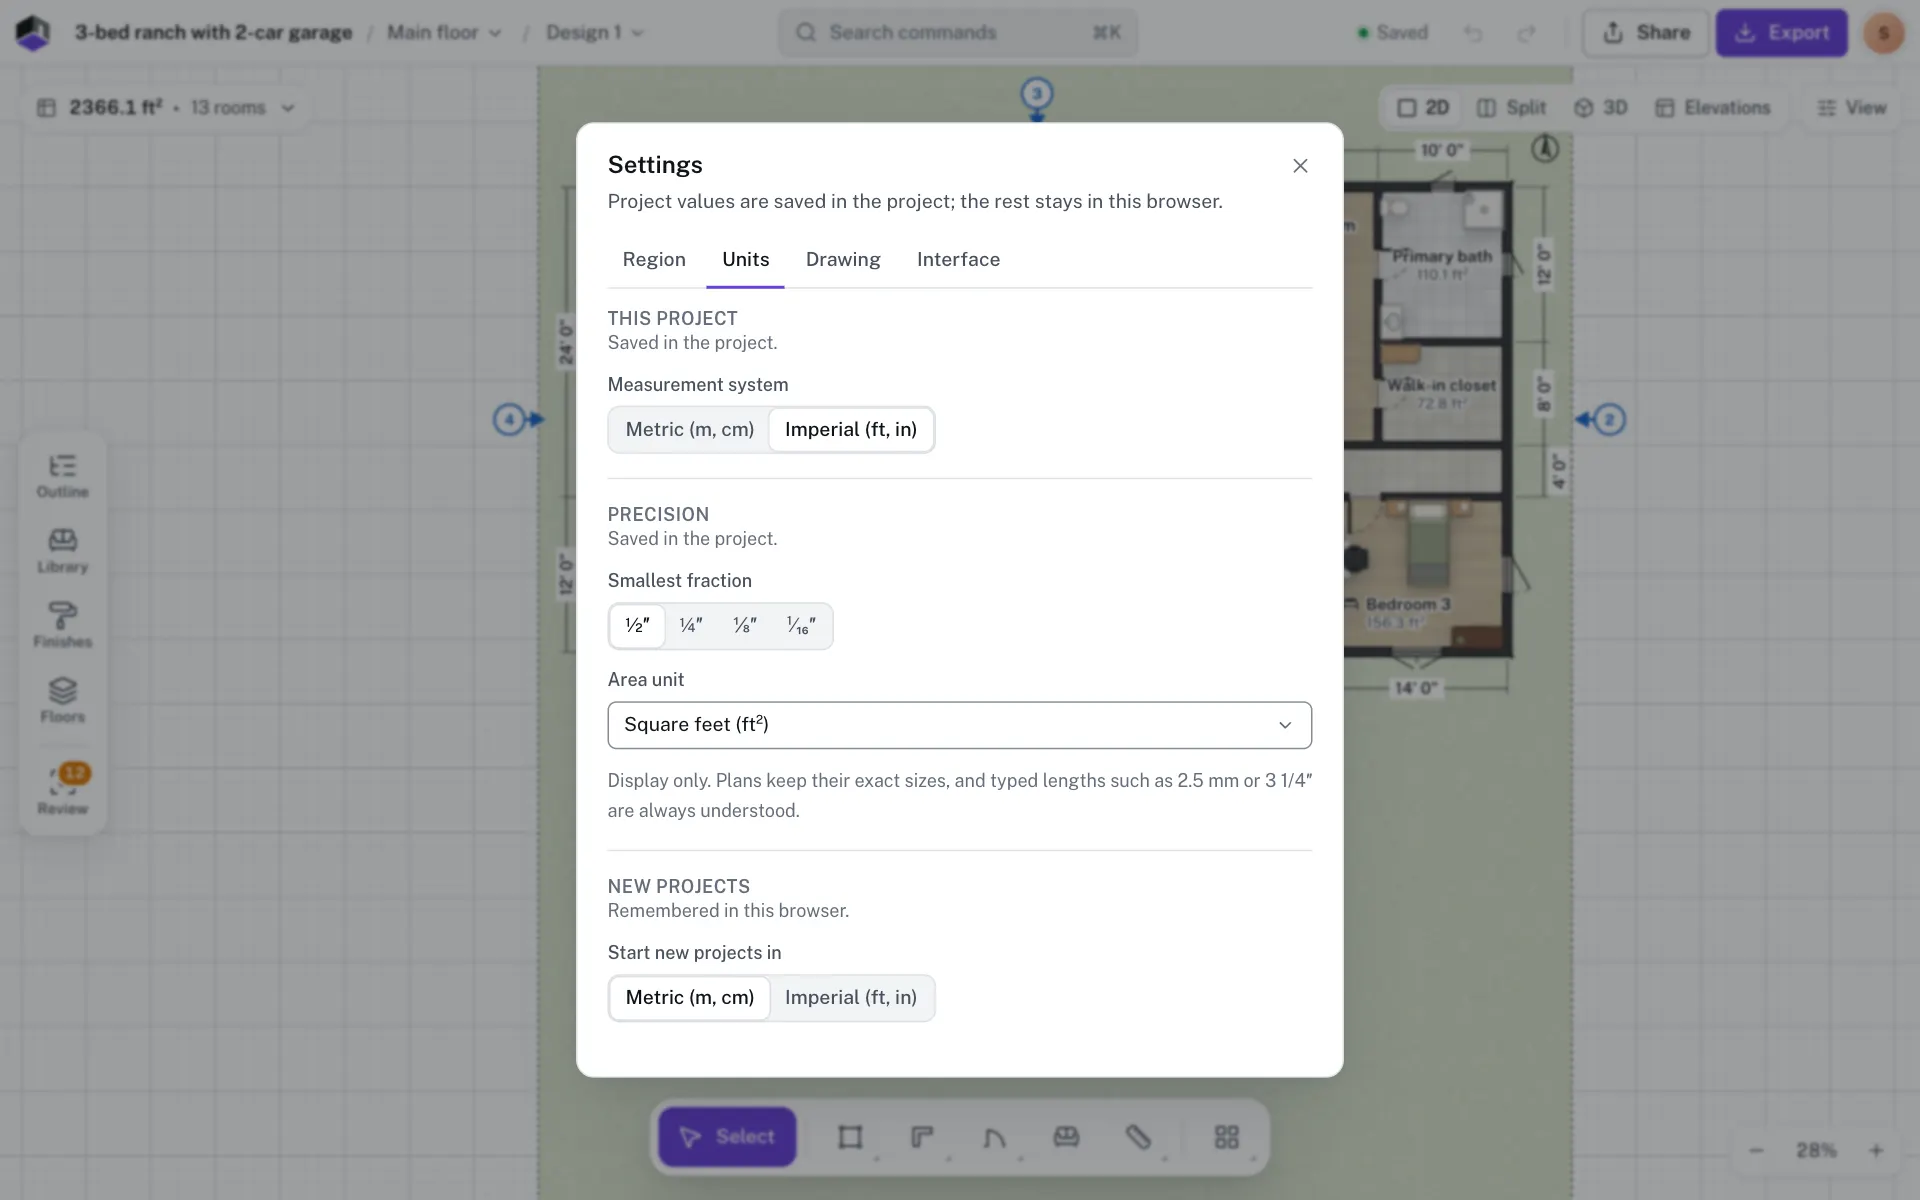
Open the account menu at the top right and choose Settings…, or press ⌘,. It opens on the Units tab the first time, then on the tab you used last.
- Step 2: Pick a tab
Choose Region, Units, Drawing or Interface.
- Step 3: Change a value
Every change applies straight away. Close the dialog with × or Esc.
What each tab holds
| Tab | Settings | Kept |
|---|---|---|
| Region | Region, Currency, Numbers, Paper and Areas lead with for this project; the region new projects start in | Project; new projects in this browser |
| Units | Measurement system; Length display or Smallest fraction and Area unit under Precision; the units new projects start in | Project; new projects in this browser |
| Drawing | Wall thickness, Wall height, Door width, Window width, Door height, Window height and Window sill for new objects; Snap to grid, Grid size, Angle step and Show wall dimensions | Defaults in the project; drawing aids in this browser |
| Interface | Language, Theme, Scroll wheel and trackpad and Show hints over the canvas | This browser |
Lengths show in the project’s units. The ranges and defaults below are in cm, with the US value beside the generic one where a region sets its own.
Region
Picking a Region sets the units, currency, paper, number format, wall build-ups, door and window sizes and building code. Walls already drawn keep their size. Each value below the region can still be changed on its own. The regions are: United States; Canada; Mexico; UK and Ireland; Germany, Austria, Switzerland; France; Benelux; Nordics; Southern Europe; Central and Eastern Europe; and Other / generic.
| Field | What it does | Choices | Default |
|---|---|---|---|
| Currency | The currency of prices, rates and totals in Schedules and budget. Shown as code and name, such as USD · US dollar. | A list of currencies | From the region: USD (US and Other / generic), CAD, MXN, GBP, EUR, SEK or PLN |
| Numbers | How numbers and amounts are written: the decimal mark and the thousands separator. | Region’s way, 1,234.5, 1.234,5 or 1 234,5 | Region’s way, with its example in brackets |
| Paper | The sheet a PDF print set starts on in Export. | Letter · 8.5 × 11 in, Tabloid · 11 × 17 in (ANSI B), the usual US permit set, ARCH C · 18 × 24 in, ARCH D · 24 × 36 in, full-size US sheets, A4 · 210 × 297 mm, A3 · 297 × 420 mm, A2 · 420 × 594 mm, A1 · 594 × 841 mm, planning submissions | US and Canada: Tabloid. Mexico: Letter. UK and Europe: A3. Other / generic: A4 |
| Areas lead with | Which area the plan summary puts first. | Net or Gross | US, Canada and Mexico: Gross. Elsewhere: Net |
| Start new projects in | Under New projects: the region the New project dialog starts with. Remembered in this browser. | The eleven regions | United States if new projects start in imperial, otherwise Other / generic |
An older project on Super built-up also sees that choice under Areas lead with. A currency FloorGen no longer offers stays in the list only for a project that already uses it.
Units
Measurement system switches the project between Metric (m, cm) and Imperial (ft, in). Precision holds Length display in metric or Smallest fraction in imperial, and Area unit. Start new projects in under New projects sets the units the New project dialog starts with; it is Metric (m, cm) until you change it. See Language and units for every choice.
Drawing
Defaults for this project are used for new walls, doors and windows and saved in the project. Objects already drawn keep their sizes, and the storey height does not change. Picking a region sets them all. The defaults below are those of the Other / generic region, with the US values in brackets; other regions set their own.
| Field | What it sets | Range | Default |
|---|---|---|---|
| Wall thickness | The thickness of new walls. | 2–200 cm | 12 cm (US: 11.5 cm, about 4½ in) |
| Wall height | The height of new walls. It can’t make a wall taller than its storey. | 30–2000 cm | 260 cm (US: 8 ft, 243.8 cm) |
| Door width | The width of a new door. | 30–500 cm | 90 cm (US: 32 in) |
| Door height | The height of a new door. | 150–500 cm | 210 cm (US: 80 in) |
| Window width | The width of a new window. | 30–500 cm | 120 cm (US: 36 in) |
| Window height | The height of a new window. | 30–500 cm | 130 cm (US: 48 in) |
| Window sill | How high a new window sits above the floor. | 1–500 cm | 90 cm (US: 32 in) |
| Field | What it does | Choices | Default |
|---|---|---|---|
| Snap to grid | Corners and items land on grid points. Hold ⌥ while drawing to place freely. | On or off | On |
| Grid size | The grid spacing. | 1, 5, 10, 25 or 50 cm in metric; 1″, 3″, 6″ or 1′ in imperial | 10 cm, in imperial too, until you pick another |
| Angle step | The angles a wall snaps to while you draw it. | 15° (default), 5°, 10°, 30°, 45°, 90° (square only) or Off | 15° |
| Show wall dimensions | Shows each wall’s length on the plan. | On or off | On |
Interface
| Field | Choices | Default |
|---|---|---|
| Language | Automatic, which follows your browser, or one of five languages. See Language and units. | Automatic |
| Theme | System, Light or Dark | System |
| Scroll wheel and trackpad | Auto, Pan or Zoom; see below | Auto |
| Show hints over the canvas | Shows the line that explains the current tool | On |
| Choice | Scrolling | To zoom | To pan |
|---|---|---|---|
| Auto | A two-finger trackpad scroll pans; a mouse wheel zooms at the pointer | Pinch, or hold ⌘ while scrolling | Scroll on a trackpad, or hold ⇧ with a mouse wheel |
| Pan | Always pans the plan | Pinch, or hold ⌘ while scrolling | Scroll |
| Zoom | Always zooms at the pointer | Scroll | Hold ⇧ while scrolling, or drag empty space |
On Windows, use Ctrl where the table says ⌘. The same setting is the Scroll wheel row in View options and sits at the top of the keyboard shortcuts list (?).
The Project settings panel
For the project itself, press ⌥1, or search for Open Project settings with ⌘K. The panel opens on the left and is the quickest place to rename the project, switch units or change the storey height. Project details in the account menu shows the same fields with more below them. See Tour of the editor.
| Field | What it does | Range | Default |
|---|---|---|---|
| Project name | The project’s name, as on the projects page. It can’t be left empty. | Up to 80 characters | The name you gave it |
| Units | Metric (m, cm) or Imperial (ft, in) for this project. | From the region | |
| Precision | Length display in metric or Smallest fraction in imperial, and Area unit. | From the region | |
| Floor and design | Switches the open floor and design, as the menus in the top bar do. | ||
| Storey height | The open floor’s height, floor to floor, used to stack the floors in 3D. It does not raise walls already drawn. | 100–2000 cm | 280 cm |
| Projects | New project, All projects and Version history. Projects save automatically in this browser. |
Questions
Why did my settings change when I opened another project?
Region, units and the drawing defaults belong to each project. The drawing aids, language and theme belong to this browser.
How do I make every new project start in feet?
In the Units tab, set Start new projects in to Imperial (ft, in). To start in a region, set it in the Region tab.
I changed Wall height. Why didn’t my walls get taller?
Wall height is for walls you draw next. Select the walls already drawn and change their Height, and raise the floor’s Storey height first if they need to go higher. See Heights and levels.
Where are the grid and snap switches without opening Settings?
In View options at the top right. See View options and plan styles.